Friday, 24 February 2017
Thursday, 16 February 2017
Lighting for Photography
Split Lighting

This is an example of Split Lighting. i know this because half of her face is shadow, and the other half is covered with light.
Loop Lighting

This is and example of Loop Lighting. I know this because of the small shadow around her right nostril.
Rembrandt

This is an example of Rembrandt lighting. I know this because of the small triangle of light underneath her left eye.
Tuesday, 14 February 2017
Photography
Shallow Depth of Field
These Photos are examples of Shallow depth of field because the focus is on a very close subject and the background is blurred.
Long Depth of Field


These photos are examples of a long depth of field because both of these photos focus on a point off in the distance.
Slow Shutter speed
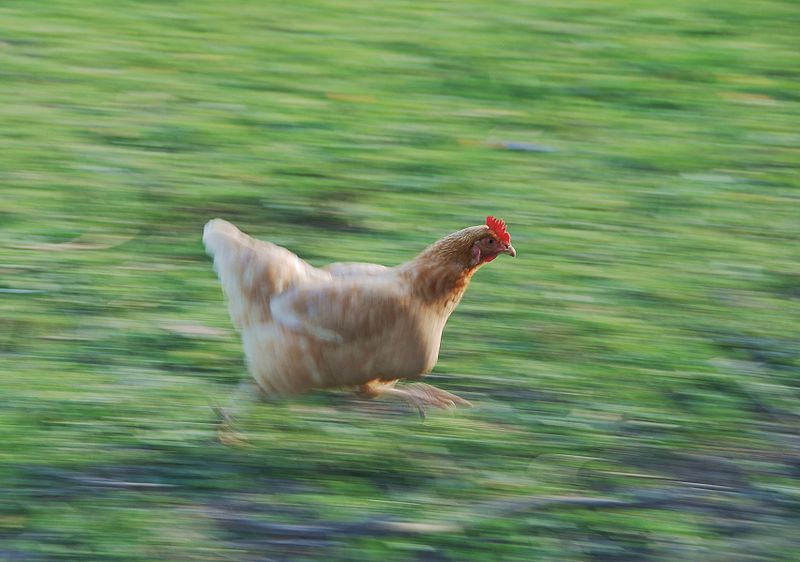

These photos are examples of a slow shutter-speed. this is because the subject were in motion and because the shutter-speed was so slow, caused the picture to become blurred.
Fast Shutter speed


These photos are examples of a fast shutter-speed. this is because the subject was in motion, but the shutter was so fast it caught the subject in motion.
ISO 100


these photos are examples of pictures taken with ISO 100. you can tell because the environment in both pictures are bright, therefore there is no need for a high ISO. Because of this, the picture looks smooth.
ISO 3200


These are examples of pictures being taken with an ISO of 3200. High ISO is mainly used when taking pictures in the dark. this helps the picture look smooth, and less grainy.
Monday, 6 February 2017


Thursday, 17 December 2015
Surrealism Photography

1. The message I want to portray in this photograph is that
school stresses students out. It doesn't matter if it's homework, tests, or
extracurricular, if students have a lot of homework and tests to study
for, it can take a huge toll on their health and wellbeing, both physically and
mentally. When students are bombarded with schoolwork and other things, they
might not have time to finish all of it because of personal reasons, then the
teachers get them in trouble plus their marks drop. When the marks drop, so
does the students self confidence, then they'll just stop trying and give up
all together.
2.
I actually didn't have any sketches close to my finished product, this is
because a quarter of the way through, I changed my idea. I was taking pictures
of my friend when I decided that I wanted to make my photo a school setting,
but I couldn't think of anything related to school and social issues so I
started getting really stressed because I was running out of time, then....it
hit me... my topic would be schools stressing out students. So I took a picture
of Angel in the hallway and got to work. I wanted my photo to be creepy
in a way so I was more focused on the physical toll that stress can take.
I looked up hot to put a cut and peeling effect on photos and found a really
good video on YouTube here. I found some images of peeling and cracking
paint and placed them on top of the picture of Angel. I proceeded to create a
layer mask and selected my brush tool, I erased the parts of the picture I
didn't need and matched the colour of the image to angels skin tone, making her
skin look cracked, and un-moisturized. I played around with contrast and
brightness until I was satisfied and created a red gradient over top of the
image making it look more spooky.
3. I learned lots of things during this project,
many of them being Photoshop Techniques like, using masks, merging 2 photos
together, and using the gradient tool. Even though I changed my idea im happy
with how it turned out because it looks really nice and professional….in my
eyes anyway.
Tuesday, 1 December 2015
Monday, 23 November 2015
Subscribe to:
Posts (Atom)